Gutenberg has a default set of styling options when it comes to things like font styles and colors. But what if you wanted to make certain elements from your design available in the editor? In this article we will go over several methods of injecting custom styles into Gutenberg.
Defining the library for Gutenberg
Libraries are how you tell Drupal what styles and scripts you want to load. To inject css and javascript into the editor, you'll want to define a library in your theme's libraries.yml file. As a manner of convention, we name this library "editor." The following is an example of what you might use to define an editor library:
editor:
  js:
    js/gutenberg.js: {}
    js/theme.js: {}
  css:
    theme:
      'https://fonts.googleapis.com/css2?family=Open+Sans:ital,wght@0,300;0,400;0,700;1,400;1,700&display=swap': {type: external}
      css/style.css: {weight: 40} #main stylesheet also used on the front end
As you can see, this is set up to inject fonts and some js/css files from the local theme into Gutenberg. Including your theme's styles and scripts into the editor itself will typically give you a much better approximation of what your document will look like when rendered by the theme.
Adding your library to Gutenberg
Adding the gutenberg.yml file to your theme
The way you communicate with Gutenberg is through a special yml file in your theme. In the root directory of your theme, you will need to create a new yml file, which should be [theme_machine_name].gutenberg.yml. For instance, if your theme's machine name is mytheme your file will need to be named mytheme.gutenberg.yml.
Adding your libray to gutenberg.yml
In this new gutenberg.yml file, all you have to is define libraries-edit and list your library under it:
libraries-edit:
  - themename/editor #replace "themename" with your theme's machine name
That's all there is to it. Clear the Drupal cache and reload your editor and your editor should have a lot of the styles your theme does!
Note that markup in the editor is slightly different than the front-end rendered version, so you may need to tweak your css selectors to target elements both on the front end and in the editor.
Adding additional options to the Gutenberg UI: 2 methods
You can use the gutenberg.yml file and javascript to define additional settings for Gutenberg blocks.
Using gutenberg.yml
In the gutenberg.yml file we just created you can define the theme-support item to add additional color and font size options. Below is an example that adds additional color options and font sizes:
libraries-edit:
- themename/editor
theme-support:
fontSizes:
- name: "Tiny"
size: 8
slug: "tiny"
colors:
- slug: "yellow"
name: "Yellow"
color: "#FFCF28"
- slug: "white"
name: "White"
color: "#Fff"
- slug: "black"
name: "Black"
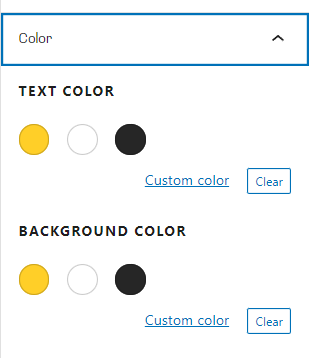
color: "#262626"After clearing the Drupal cache you should now see your custom colors and font sizes in the settings for various blocks now.
Using javascript to register and unregister block styles
You may have noticed in the library we created above that there was a javascript file that we included: gutenberg.js. Gutenberg provides methods of both creating and removing style options for core Gutenberg blocks. Here's what a boilerplate version of the gutenberg.js file looks like:
(function ($, Drupal, window) {
wp.domReady(() => {
(function(drupalSettings) {
//here is where we add/remove block styles
})(drupalSettings);
});
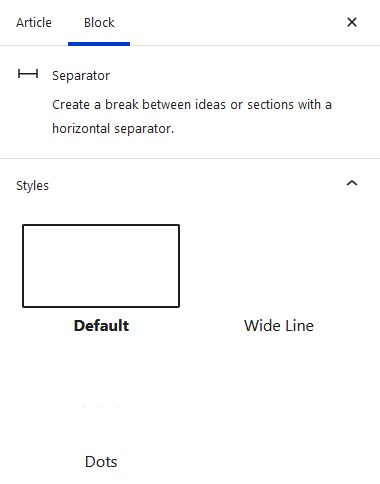
})(jQuery, Drupal, window);As an example, let's look at the "separator" block provided by Gutenberg. By default, there are 3 styles of separator: Default, Wide Line, and Dots
Let's say our design only calls for one style of separator, the default one. This means we can remove the other 2 types of separator to keep our editor as simple as possible. This is achieved by using the unregisterBlockStyle method:
(function ($, Drupal, window) {
  wp.domReady(() => {
    (function(drupalSettings) {
    //here is where we add/remove block styles

      drupalSettings.gutenberg._listeners.init.push(() => {
        blocks.unregisterBlockStyle( 'core/separator', ['dots','wide'] );
      });

    })(drupalSettings);
  });
})(jQuery, Drupal, window);
Note the bold portion in the above code. What we're doing is pushing a call to unregisterBlockStyle when the editor is initialized. Note the two arguments that are passed to the function:
- 'core/separator' - this is the namespace of the block (core) and the name of the block (separator) separated by a forward slash
- ['dots','wide'] - this is an array of styles to remove, where each element is the name of the block style
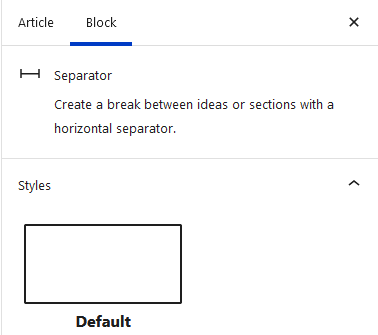
If you reload the editor, you should now see that there is only the default separator style:
Adding additional styles works much the same way. Say you want to create additional paragraph styles. In our example, we will add two new styles, called "Lead" and "Small". To accomplish that we will use the registerBlockStyle method.
(function ($, Drupal, window) {
  wp.domReady(() => {
    (function(drupalSettings) {
    //here is where we add/remove block styles
      drupalSettings.gutenberg._listeners.init.push(() => {
        blocks.unregisterBlockStyle( 'core/separator', ['dots','wide'] );

        blocks.registerBlockStyle( 'core/paragraph', [
          {
            name: 'lead',
            label: 'Lead',
          },
          {
            name: 'small',
            label: 'Small',
          }
        ]);

      });
    })(drupalSettings);
  });
})(jQuery, Drupal, window);
Note that there are still two arguments passed to this method:
- 'core/separator' - this is the namespace of the block (core) and the name of the block (paragraph) separated by a forward slash
- [ { name : 'lead' , label : 'Lead' } , { name : 'small', label: 'Small' } ] - this is an array of json objects, each containing a name and label attribute
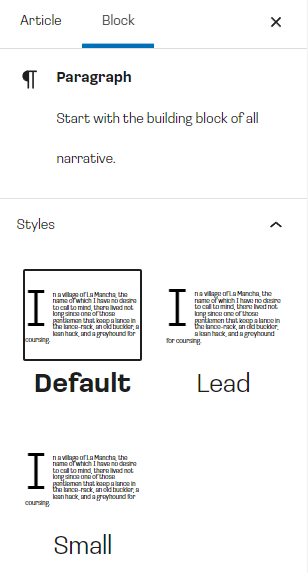
Reload your editor and you should now see the 2 new paragraph styles, along with a "Default" option:
Under the hood what this actually does is add a new class to your block based on the name of your custom style. You will need to use css to target this new class to change its appearance.
Most Gutenberg core blocks can be registered/unregistered in this manner, include image, paragraph, separator, table, heading, etc.
Check out part 4 for more information on embedding Drupal blocks in Gutenberg.