Patterns
Patterns allow you to define pre-determined groups of blocks that can be inserted into Gutenberg documents. These patterns will retain any custom attributes or settings you have added to them. Below we will outline how to set up patterns, how to use them, and go over the process of creating a simple pattern.
Adding patterns to gutenberg.yml
In part 3 of this series, we went over how to set up the gutenberg.yml file. Patterns are also defined in this same file. In gutenberg.yml, you will need to set up the yaml structure to allow Gutenberg to pick up on your patterns:
theme-support:
  __experimentalBlockPatternCategories:
    -
      label: Layout Elements
      name: layout
  __experimentalBlockPatterns:
    -
      categories:
        - layout
      content: |-
        <!-- wp:group -->
        <!-- /wp:group -->
      description: "Description of pattern"
      name: theme_machine_name/pattern_name
      title: "Name of Pattern"
This is the basic scaffolding you will need to start defining patterns. There a few notable things about this yaml structure, the first of which is the __experimentalBlockPatternCategories section. This is a list of key/value pairs that you can define to make it easier to filter your patterns. You can feel free to duplicate the existing category and create as many categories as you deem necessary.
The second portion of this yaml structure is where all the heavy lifting is done: __experimentalBlockPatterns. This is where you define the actual pattern, and each one requires the following attributes:
- categories - this should be a key from any of the categories you defined in __experimentalBlockPatternCategories
- content - this is the Gutenberg-generated markup for your pattern, more on that shortly
- description - a text description of what this pattern does/looks like
- name - this should be the machine name of your theme and a machine name for the pattern, separated by a forward slash(/)
- title - a descriptive name for the pattern
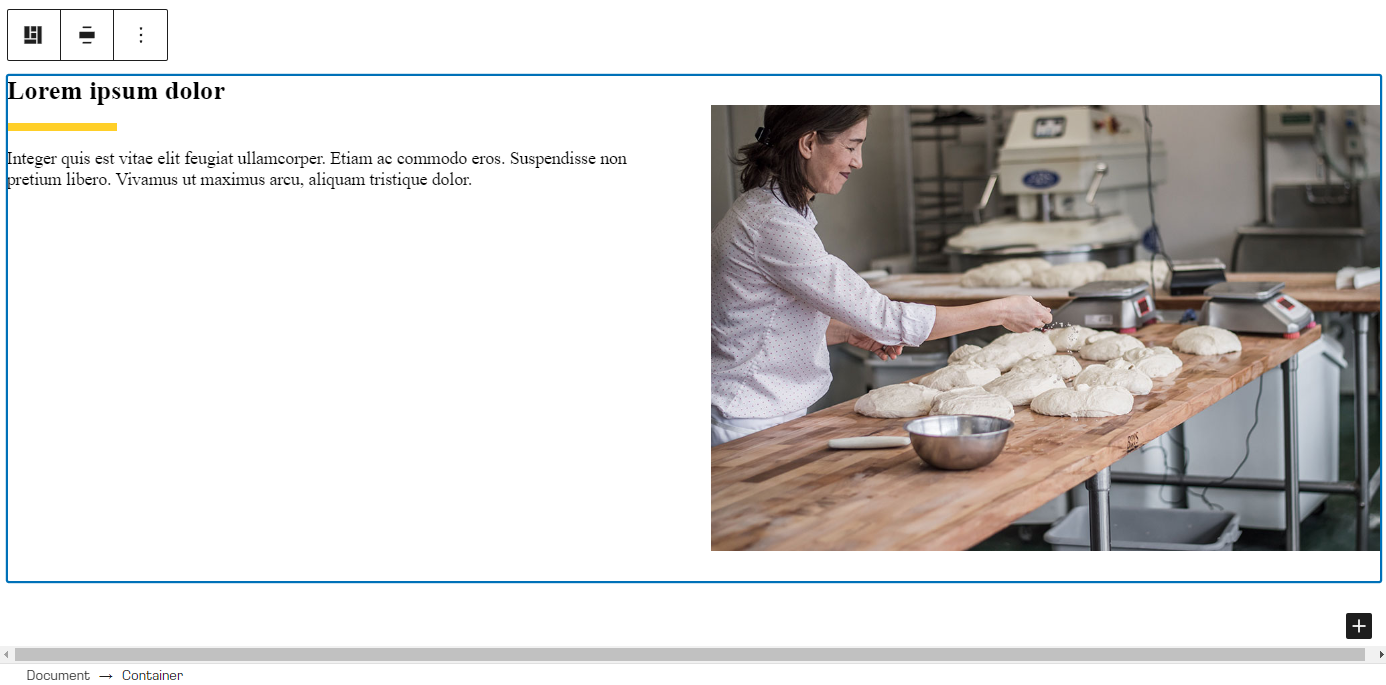
Now that we have our yaml file and have the basic structure in place, we're going to create a pattern. For this example, will will create a Bootstrap container with a 2-column layout, with a title and description on one side, and an image on the other side. Here's an example of what the pattern will look like:
Lorem ipsum dolor
Integer quis est vitae elit feugiat ullamcorper. Etiam ac commodo eros. Suspendisse non pretium libero. Vivamus ut maximus arcu, aliquam tristique dolor.

Now that we have defined our group of blocks in the Gutenberg editor, we need to add it to our yaml file. This is as easy as copying and pasting it in. So in the editor, first select the top level block in your pattern, in this case it's our Bootstrap container:
Next, click the three dots in the contextual settings menu to expand additional options, then select "Copy"
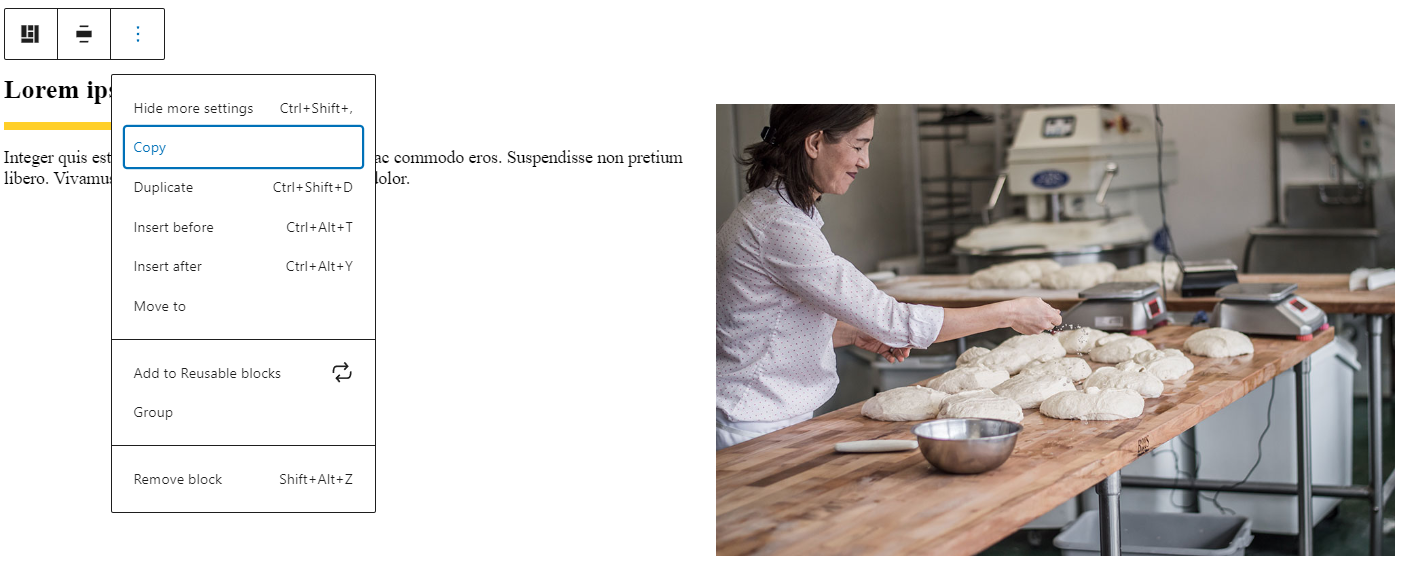
You can also use Ctrl+C (Command+C on Mac) to copy the currently select element to the clipboard. Once you have copied from Gutenberg, you want to paste into the content attribute of your pattern. This should give you a yaml file that looks like this:
theme-support:
__experimentalBlockPatternCategories:
-
label: Layout Elements
name: layout
__experimentalBlockPatterns:
-
categories:
- layout
content: |-
<!-- wp:bootstrap/container -->
<div class="alignwide container"><!-- wp:bootstrap/row -->
<div class="row"><!-- wp:bootstrap/column {"sizeXs":12,"sizeLg":6} -->
<div class="col-12 col-lg-6"><!-- wp:heading -->
<h2>Lorem ipsum dolor</h2>
<!-- /wp:heading -->
<!-- wp:separator {"className":"is-style-short-hr"} -->
<hr class="wp-block-separator is-style-short-hr"/>
<!-- /wp:separator -->
<!-- wp:paragraph -->
<p>Integer quis est vitae elit feugiat ullamcorper. Etiam ac commodo eros. Suspendisse non pretium libero. Vivamus ut maximus arcu, aliquam tristique dolor.</p>
<!-- /wp:paragraph --></div>
<!-- /wp:bootstrap/column -->
<!-- wp:bootstrap/column {"sizeXs":12,"sizeLg":6} -->
<div class="col-12 col-lg-6"><!-- wp:drupalmedia/drupal-media-entity {"mediaEntityIds":["49"],"align":"full"} /--></div>
<!-- /wp:bootstrap/column --></div>
<!-- /wp:bootstrap/row --></div>
<!-- /wp:bootstrap/container -->
description: "Two column layout with text left and image right"
name: mytheme/2_col_text_image
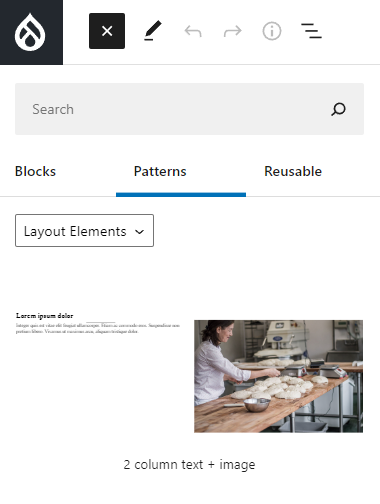
title: "2 column text + image"Now clear the Drupal cache and when you reload the editor and open the block browser, you should see a new tab at the top called "Patterns". Click that and you should now see the pattern we just created. Simply click on it to insert it into your document.
That's all there is to it! This example is a pretty bare-bones pattern but there's no limit to how complex you can make them. When properly configured, patterns allow you to assemble complex layouts containing rich content with a few simple clicks.
Lastly, here is a small cheat sheet for creating new categories or patterns. Simply copy/paste these onto a new line either under __experimentalBlockPatternCategories or __experimentalBlockPatterns
Category:
    -
      label: [Label for Category]
      name: [machine_name_of_category]
Pattern:
    -
      categories:
        - [category_machine_name]
      content: |-
        [element_copied_from_gutenberg]
      description: "[description]"
      name: [theme_machine_name]/[pattern_machine_name]
      title: "[pattern_title]"
In part 6 we will discuss how to set up pre-defined Gutenberg templates for your content types.